
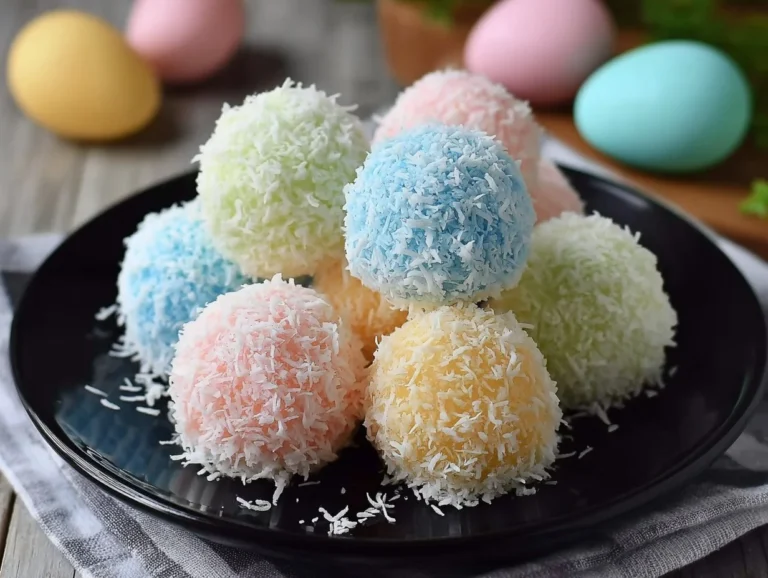
Bunny Coconut Tails are delightful, sweet no-bake treats perfect for celebrations or everyday indulgence. You’ll love their texture and coconut flavor, making them a hit for parties or special gatherings. What makes these charming little bites even more special is their colorful, festive coating that adds a touch of magic to every festive table!
Table of Contents
Recipe at a Glance
| Best for | Easter celebrations, Parties |
| Difficulty | Easy |
| Total time | 1 hour 15 minutes |
| Servings | 24 servings |
| Key tip | Chill mixture well to set |
| Smart swap | Use shredded chocolate for coating |
What Ingredients Make Easter Bunny Coconut Tails Special?
Wondering what gives Easter Bunny Coconut Tails their delightful taste? It all starts with shredded coconut, which brings a lovely texture to each bite. The use of sweetened condensed milk adds a creamy sweetness that balances the coconut flavor perfectly. Using both fine and medium shredded coconut creates an appealing contrast and enhances both outer texture and creaminess.
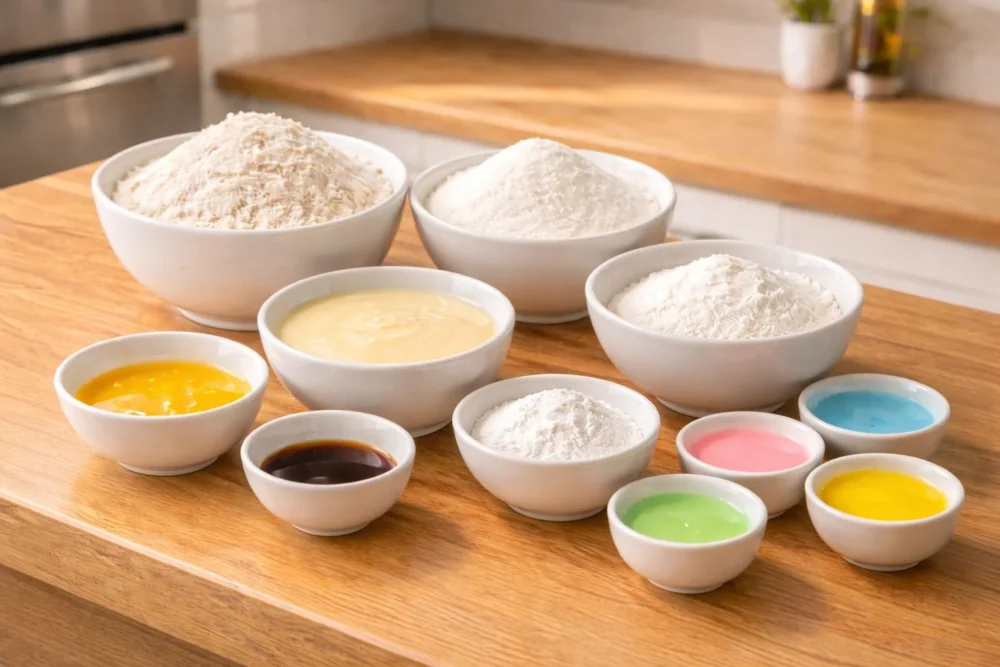
| ✔ 5 cups unsweetened coconut (medium shred) | |
| ✔ 2 cups unsweetened coconut (fine shred) | |
| ✔ 14 oz sweetened condensed milk | |
| ✔ 2 tbsp butter, melted & cooled | |
| ✔ 1 tsp vanilla extract | |
| ✔ ¼ cup confectioner’s sugar | |
| ✔ Liquid food coloring (for pastel magic!) |
Substituting the regular butter with a dairy-free option allows you to create a vegan version. This small swap doesn’t compromise the texture and keeps your treats equally delicious! Additionally, the liquid food coloring elevates the visual appeal, transforming simple coconut bites into vibrant, playful treats that enchant everyone. For a fun twist, you can also utilize colorful sprinkles instead of food coloring for a festive vibe; just let your creativity shine when preparing these treats! Check out this Strawberry Crunch Brownies for another delightful recipe using colorful ingredients!
Do I Need Any Special Equipment for Making Easter Bunny Coconut Tails?
– Large mixing bowl
– Whisk
– Baking sheet
– Refrigerator
How Do I Create These Delicious No-Bake Treats Step by Step?
The process of making Easter Bunny Coconut Tails is as simple as it is fun! You’ll blend together a few ingredients, chill, and then create delightful, colorful bites that are sure to impress your guests. Follow these steps carefully, and you’ll be on your way to having these charming treats in no time.
Step 1
In a large mixing bowl, whisk together the sweetened condensed milk, melted butter, and vanilla extract until smooth and creamy.
Step 2
Next, stir in the medium-shred coconut along with the confectioner’s sugar. Make sure everything is evenly combined and then chill the mixture for about 15 minutes. This step is crucial for shaping your bites later!
| Prep Time | 15 minutes |
| Cook Time | 1 hour (setting time) |
| Nutritional Value | High in fiber, low in artificial additives |
Step 3
While the coconut mixture chills, color your fine-shred coconut. Mix ½ cup of fine coconut with 3-4 drops of liquid food coloring. Blend thoroughly until the coconut is evenly coated. You can repeat this for different colors to create a rainbow effect! Once the coconut mixture is chilled, scoop out 1½ teaspoon portions, roll them into small balls, and then roll each ball in the colored coconut to coat completely. Place your charming little bites on a baking sheet lined with parchment paper.
Finally, refrigerate these bites for about an hour until set. Once firm, they are ready to be served! Enjoy these colorful, sweet little coconut wonders as a delightful treat for family gatherings or simply for yourself!
Common Mistakes to Avoid + Pro Tips for Success
I’ve made my fair share of coconut treats, and I can tell you that following the right steps makes all the difference! Sometimes, it can be tricky to achieve the perfect texture or flavor. Here are some helpful tips to ensure your Easter Bunny Coconut Tails turn out just right.
Mistakes to Avoid
– Skipping the Chill Time: Rushing the chilling period can make rolling difficult and cause your balls to lose shape. Ensure you chill for the full 15 minutes.
– Overworking the Mixture: If you stir too much, the mixture becomes too dense, making it hard to form the balls. Just mix until combined!
– Not Coating Properly: Skipping the colorful coating will lessen the visual appeal. Make sure you coat each ball thoroughly for that festive charm.
Tips for Success
– Choose Quality Coconut: Opt for good quality unsweetened coconut for a better flavor. The texture should be right for the delicious creaminess of each bite.
– Experiment with Colors: Use a variety of food coloring to create a rainbow effect, making them an eye-catching addition to your dessert table.
– Prep Ahead: Make these bites a day early! They keep well in the refrigerator, enhancing the flavor while saving you time on the big day.
The most important takeaway is to ensure your coconut mixture is chilled long enough; this will lead to the most delightful shape and texture.
Why You Will Love Easter Bunny Coconut Tails
Easter Bunny Coconut Tails are the epitome of delightful no-bake treats! Not only are they simple to create, but they are also magically colorful and delicious.
Sweet and Chewy Goodness
These treats offer a wonderful chewy texture that feels oh-so-decadent while being light on your palate. The coconut brings a tropical delight, making each bite feel like a mini-vacation.
Versatile Colorful Coatings
The rainbow of colors makes these treats a fun and exciting option for any festive occasion. Kids and adults alike will delight in choosing their favorite color-enhanced treat!
Perfect for Sharing
They are not only great for parties, but also perfect for gifting! Package them up in clear bags tied with bright ribbons for a sweet thoughtful gift that shines during celebrations or simply to brighten someone’s day.
A Personal Touch
As someone who enjoys getting creative with my baking, these Easter Bunny Coconut Tails bring out my inner artisan. You’d be surprised by how much fun it is to mix and match colors or even add chocolate sprinkles!
Fun Variations, Serving, and Storage Ideas
There’s so much you can do with these adorable treats! Whether you want to change up the flavors or presentation, there’s a variation for everyone.
Creative Color Themes
Try seasonal colors for different occasions, pastel colors for Easter, orange and brown for Halloween, or red and green for Christmas! You can also create a monochromatic look using varying shades of one color for a chic dessert table.
Flavor Swaps
Consider incorporating extracts like almond or lemon for a fun flavor twist. If you’re feeling adventurous, mixing in some matcha powder or cocoa powder can alter the base flavor while keeping it delicious! Insert naturally within the text: Check out this no-bake German chocolate pie.
Perfect Serving Suggestions
These delightful bites fit perfectly on dessert platters or as part of an Easter brunch spread. Arrange them with other sweet treats for a visually appealing dessert bar that guests will love!
Storing and Make Ahead Tips
You can keep these treats in an airtight container in the refrigerator for up to a week. They maintain their delightful chewiness and flavor beautifully! To refresh, just let them sit out at room temperature for a few minutes before serving to enjoy the ideal texture.
| Idea | Best for | How to do it |
| Color Themes | Festive Events | Use seasonal colors |
| Flavor Twists | Creative Palates | Incorporate almond or lemon extract |
| Serving Suggestions | Dessert Buffets | Plate with other sweet treats |
| Storage Tips | Meal Prepping | Airtight container in the fridge |
More Recipes You Can Try Next
If you’re looking for more delicious treats to whip up, here’s a few to consider.
| Earthquake Cake | This rich and chocolatey cake is a crowd-pleaser! |
| Strawberry Roll Cake | Light and fluffy dessert with a delightful strawberry twist. |
| Strawberry Cheesecake Protein Balls | Quick and nutritious bites perfect for snacking! |
Final Thoughts
Making Easter Bunny Coconut Tails is a simple yet fun way to bring sweetness to your celebrations. I love how easy they are to prepare and how delightful they look! Try them as a delightful addition to party platters, or just treat yourself after a long day. Don’t forget to get the kids involved, they’ll adore helping with the colorful coconut coating!
For even more food inspirations and mouthwatering treats, check my Pinterest for creative ideas and recipes: Explore here!
FAQ
Can I use sweetened coconut for these treats?
When making Easter Bunny Coconut Tails, you should use unsweetened coconut to control the sugar content. Sweetened coconut can make these bites overly sweet, overshadowing the subtle coconut flavor. You want just the right balance to enjoy the creamy condensed milk.
How long can I store these treats?
You can store Easter Bunny Coconut Tails in an airtight container in the refrigerator for up to a week. They maintain their delightful texture and flavor during this time. Just let them sit out a few minutes at room temperature before serving for the best experience.
Can I make these treats vegan?
Absolutely! You can easily make these treats vegan by swapping regular butter for a dairy-free alternative. Coconut oil or vegan margarine work well without sacrificing flavor or texture, allowing everyone to enjoy these delightful bites.
What if I don’t have food coloring?
If you don’t have liquid food coloring, consider using powdered colorants or natural alternatives such as beet juice or matcha powder. Both options will give a vibrant hue while maintaining the integrity of the coconut flavor.
Can I freeze these coconut bites?
It is not recommended to freeze Easter Bunny Coconut Tails, as the texture may change upon thawing. These bites are best enjoyed fresh or stored in the fridge for a few days to maintain their delightful chewiness.
Easter Bunny Coconut Tails
Delightful, sweet no-bake treats perfect for celebrations or everyday indulgence with a colorful, festive coating.
- Total Time: 75 minutes
- Yield: 24 servings 1x
Ingredients
- 5 cups unsweetened coconut (medium shred)
- 2 cups unsweetened coconut (fine shred)
- 14 oz sweetened condensed milk
- 2 tbsp butter, melted & cooled
- 1 tsp vanilla extract
- ¼ cup confectioner’s sugar
- Liquid food coloring (for pastel magic)
Instructions
- In a large mixing bowl, whisk together the sweetened condensed milk, melted butter, and vanilla extract until smooth and creamy.
- Stir in the medium-shred coconut along with the confectioner’s sugar. Chill the mixture for about 15 minutes.
- While the coconut mixture chills, color your fine-shred coconut with liquid food coloring.
- Scoop out 1½ teaspoon portions of the chilled mixture, roll them into balls, and coat each ball in the colored coconut.
- Place the balls on a baking sheet lined with parchment paper and refrigerate until set (about 1 hour).
Notes
Ensure the coconut mixture is chilled long enough for the best shape and texture. Experiment with different colors for a fun twist!
- Prep Time: 15 minutes
- Cook Time: 60 minutes
- Category: Dessert
- Method: No-Bake
- Cuisine: American
- Diet: Vegetarian
Nutrition
- Serving Size: 1 serving
- Calories: 150
- Sugar: 10g
- Sodium: 40mg
- Fat: 6g
- Saturated Fat: 4g
- Unsaturated Fat: 2g
- Trans Fat: 0g
- Carbohydrates: 20g
- Fiber: 2g
- Protein: 2g
- Cholesterol: 10mg