
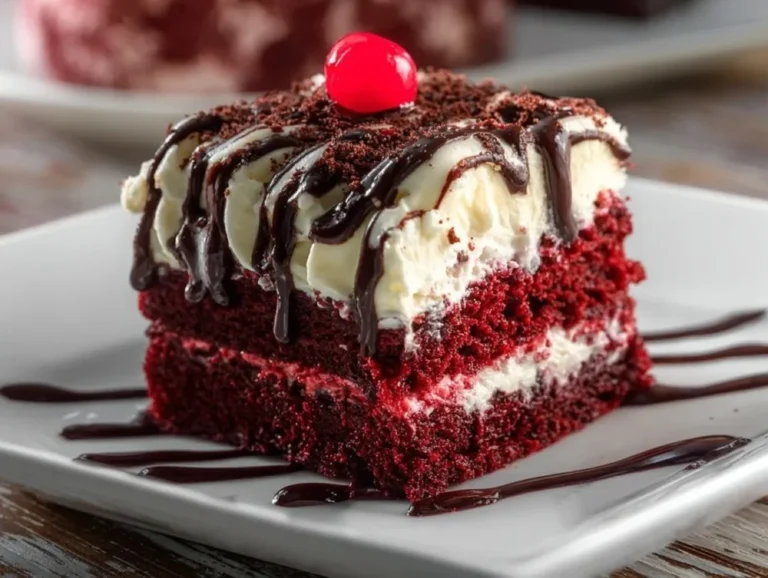
“Dive into dessert bliss with this irresistible Red Velvet Brownie Cake!”
There’s nothing quite like the swirl of rich red velvet and fudgy brownies coming together in a heavenly dessert. Imagine slicing into a vibrant red cake, revealing a moist brownie center, and all topped off with a fluffy, creamy finish. Trust me, this will undoubtedly steal the show at your next get-together or family dinner.
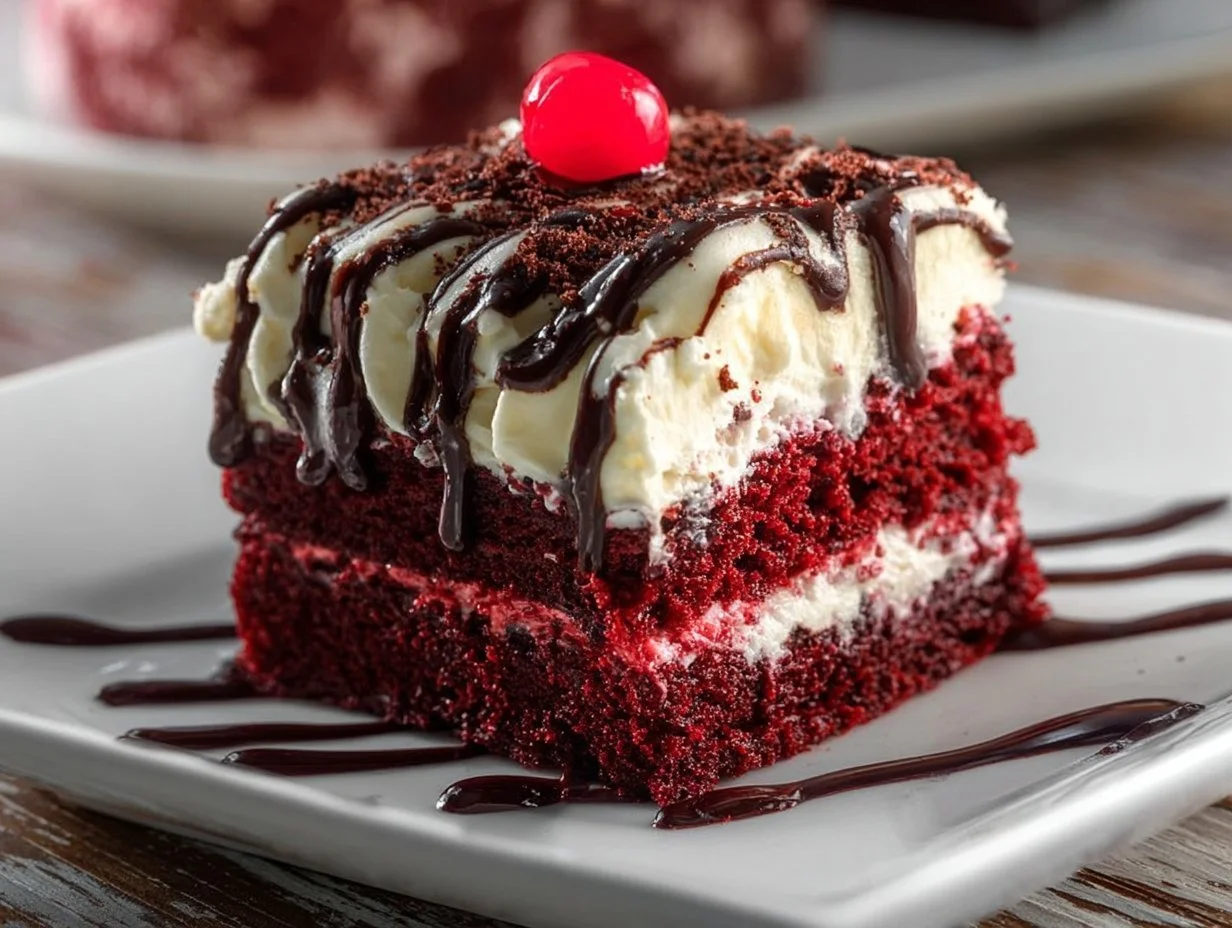
Table of Contents
Why Should You Make This Red Velvet Brownie Cake?
Absolutely! This Red Velvet Brownie Cake is perfect for celebration parties and gatherings, giving you a unique dessert experience. With its luscious layers and delightful creamy topping, it is not only a feast for the eyes but your taste buds as well. This dessert offers an elegant twist that is impressive yet surprisingly easy to whip up. It’s all about comfort food done right, especially when paired with a scoop of ice cream or a dollop of whipped cream.
This ultimate treat is ideal for birthdays, anniversaries, or just a fun dessert night, and it’s sure to create lasting memories. Also, don’t forget to check out my Creamy Coffee Chia Pudding for more delicious sweet inspirations!
What Are the Key Ingredients for This Red Velvet Brownie Cake?
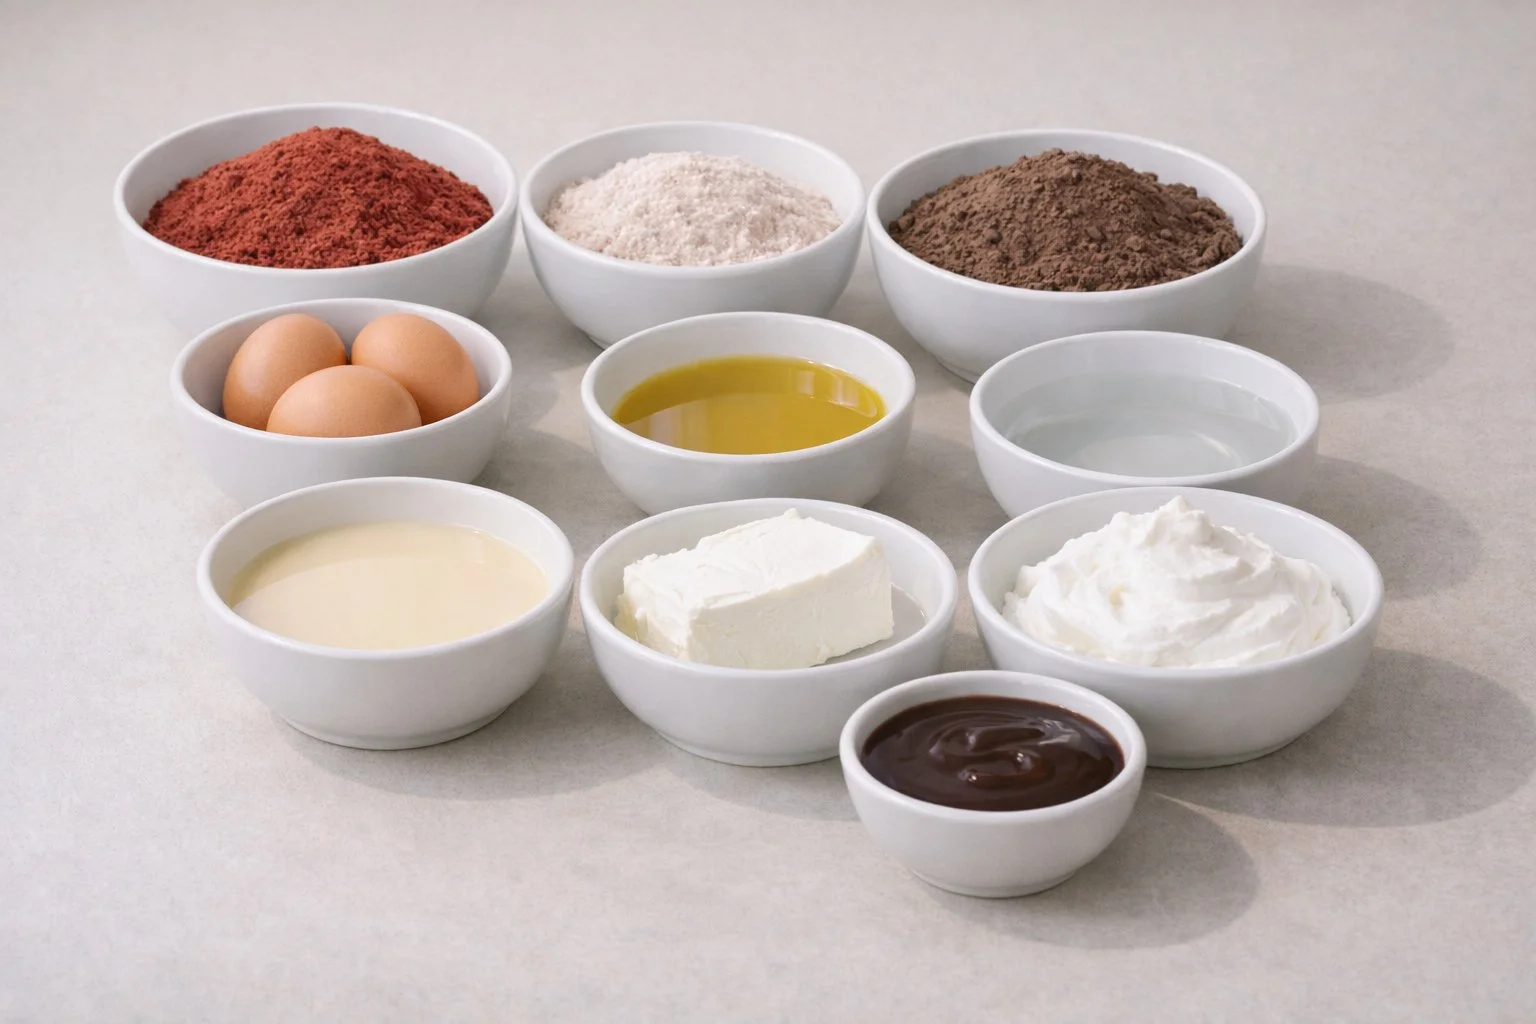
The ingredients for this delight are simple and can be found in your local grocery store. This delightful cake combines the classic flavors of red velvet with rich brownie goodness. So, let’s break down the ingredients you’ll need to bring this heavenly dessert to life.
| Ingredient | Quantity |
|---|---|
| Red velvet cake mix | 15 oz |
| Eggs (as directed on cake mix box) | — |
| Oil (as directed on cake mix box) | — |
| Water (as directed on cake mix box) | — |
| Fudge brownie mix | 18 oz |
| Eggs (as directed on brownie mix box) | — |
| Oil (as directed on brownie mix box) | — |
| Water (as directed on brownie mix box) | — |
| Sweetened condensed milk | 14 oz |
| Cream cheese | 8 oz |
| Cool Whip or whipped cream | 8 oz |
| Hot fudge sauce | for drizzling |
You can substitute the cake mix for a gluten-free variant if necessary, which opens it up for everyone to enjoy. Additionally, using a high-quality cream cheese will enhance the frosting’s flavor and texture. Both cream and sweetened condensed milk come together to form a dreamy, luscious topping, providing a velvety finish to each bite.
How Do You Make the Ultimate Red Velvet Brownie Cake Step-by-Step?
Making this Red Velvet Brownie Cake is such an enjoyable and straightforward process! The layers of flavor build beautifully and will have your kitchen smelling amazing while it bakes. Let’s get started on how to create your own masterpiece!
Step 1
Start by preheating your oven to 350°F (175°C). Grease a 9-by-13-inch baking pan well to ensure your cake comes out effortlessly after baking. This little step goes a long way in making your experience more delightful.
Step 2
Prepare the red velvet cake mix according to the package directions. Once mixed, pour the vibrant red batter into your prepared pan and spread it out evenly. It already looks so good!
| Prep Time | Cook Time | Store Time | Nutritional Values (per slice) |
|---|---|---|---|
| 15 mins | 35 mins | Store for up to 3 days in the fridge | Calories: 320, Protein: 4g, Carbs: 52g, Fat: 12g |
Step 3
In a separate bowl, prepare the brownie mix according to its package directions. Carefully pour the brownie batter over the red velvet layer in the pan; you want an even pour to create the marbled effect when baked.
Bake this beautiful combination for about 30-35 minutes or until it is set and a toothpick inserted comes out clean. This delightful cake will have an enticing aroma wafting through your home. Once it is baked, allow it to cool for about 30 minutes. Here comes the fun part: poke holes gently all over the cake and drizzle sweetened condensed milk over it. This adds a moist layer of flavor that you will love!
Now it’s time to make the cream cheese frosting. Beat the cream cheese until it’s super smooth and creamy. Gently fold in the Cool Whip and mix until well combined. This delicious frosting will go over the cake as a luscious layer. Spread it evenly over the cooled cake, and then drizzle hot fudge sauce on top for that extra touch of love!
Pop your cake in the refrigerator for at least one hour before serving to let those flavors develop. When you slice into it, you’ll be greeted by a rich red layer topped with creamy frosting, creating a dessert experience that is simply unforgettable!
How Can You Customize and Serve This Red Velvet Brownie Cake?
Definitely! Customizing your Red Velvet Brownie Cake can make it even more exciting. Let’s dive into some delicious ideas!
Vegan Friendly Alternatives
Feeling adventurous? You can adapt this cake to be vegan-friendly! Replace the eggs with applesauce or a flaxseed mixture to achieve the same consistency. Moreover, using a dairy-free whipped topping and cream cheese can make this delightful dessert accessible to a wider crowd. It’s fantastic that you can cater to everyone without compromising flavor!
Unique Flavor Profiles
For those looking to step outside the traditional red velvet experience, consider adding chocolate chips to your brownie mix. Dark chocolate adds depth to the flavor profile and pairs beautifully with the cream cheese frosting. Other variations can include experimenting with spices or extracts that evoke seasonal flavors, such as cinnamon or peppermint. Your guests will be wowed with each incredible bite!
Creative Serving Suggestions
When it comes to serving suggestions, the possibilities are endless! Consider topping slices with fresh berries or a scoop of vanilla ice cream for that classic, mouth-watering dessert feel. You can even add a sprinkle of crushed nuts for a delightful crunch. Not only does this elevate the presentation, but it adds a beautiful burst of color and flavor too. You could also experiment with this recipe by serving it at brunch alongside a nice cup of coffee, such as my Vanilla Cinnamon Latte.
Final Thoughts on the Red Velvet Brownie Cake
I truly believe this Red Velvet Brownie Cake will become your next all-time favorite dessert! With its breathtaking layering of flavors and enticing cream topping, it’s perfect for any celebration or even just a cozy night in. You can easily store any leftovers by covering it well and keeping it in the refrigerator. I promise it tastes even better the next day! You’ll definitely want to share this beauty on Pinterest to show off your epic creation. Check out my Pinterest page for more delicious recipes and tips that will have you whipping up treats confidently. Happy baking!
FAQ
Can you make Red Velvet Brownie Cake ahead of time?
Absolutely! This dessert can be made a day in advance. Prepare the cake, frost it, and refrigerate it until you’re ready to serve. Just keep in mind that the flavors meld beautifully overnight, making it even more delicious upon serving.
Can you use a different type of cake mix for this recipe?
Yes! While red velvet is traditional, you can experiment with other cake flavors, such as chocolate or vanilla, to tailor the dessert to your taste preferences.
How can I make this cake gluten-free?
To make this cake gluten-free, simply substitute regular cake mix with a gluten-free version. It’s a great way to ensure that everyone can enjoy this delicious treat without worry!
What’s the secret to perfect brownies?
The key to perfect brownies lies in not overbaking them. Start checking for doneness a few minutes before the time suggested, so they’re fudgy and moist in the center.
How should I store leftover Red Velvet Brownie Cake?
Leftover cake should be stored in an airtight container in the fridge. Be sure to consume it within three days for the best taste and texture!
Red Velvet Brownie Cake
A creamy and decadent Red Velvet Brownie Cake topped with fudge sauce, perfect for celebrations and gatherings.
- Total Time: 50
- Yield: 12 servings 1x
Ingredients
- 1 (15 oz) package Red velvet cake mix
- Eggs (as directed on cake mix box)
- Oil (as directed on cake mix box)
- Water (as directed on cake mix box)
- 1 (18 oz) package Fudge brownie mix
- Eggs (as directed on brownie mix box)
- Oil (as directed on brownie mix box)
- Water (as directed on brownie mix box)
- 1 (14 oz) can Sweetened condensed milk
- 8 oz Cream cheese
- 8 oz Cool Whip or whipped cream
- Hot fudge sauce (for drizzling)
Instructions
- Preheat your oven to 350°F (175°C) and grease a 9-by-13-inch baking pan.
- Prepare the red velvet cake mix according to package directions, pour into the prepared pan, and spread evenly.
- In a separate bowl, prepare the brownie mix according to package directions and pour over the red velvet layer in the pan.
- Bake for 30-35 minutes or until a toothpick inserted comes out clean. Let it cool for 30 minutes.
- Gently poke holes all over the cake and drizzle sweetened condensed milk over it.
- Beat cream cheese until smooth, then fold in Cool Whip. Spread the frosting over the cooled cake.
- Drizzle hot fudge sauce over the top and refrigerate for at least one hour before serving.
Notes
Can be made gluten-free by using gluten-free cake mix. For vegan options, replace eggs with applesauce and use dairy-free toppings.
- Prep Time: 15
- Cook Time: 35
- Category: Dessert
- Method: Baking
- Cuisine: American
- Diet: Vegetarian
Nutrition
- Serving Size: 1 slice
- Calories: 320
- Sugar: 25g
- Sodium: 300mg
- Fat: 12g
- Saturated Fat: 5g
- Unsaturated Fat: 5g
- Trans Fat: 0g
- Carbohydrates: 52g
- Fiber: 2g
- Protein: 4g
- Cholesterol: 80mg